# A code-based guide to separating publisher IDs, ad-unit slot IDs, and ads.txt seller records, then verifying each source without claiming approval or fill.
The most common AdSense integration error is treating an account identifier and an ad-unit identifier as the same value. This article maps Google's official terms to the current implementation of this blog. Correct configuration does not guarantee site approval, ad fill, or revenue.
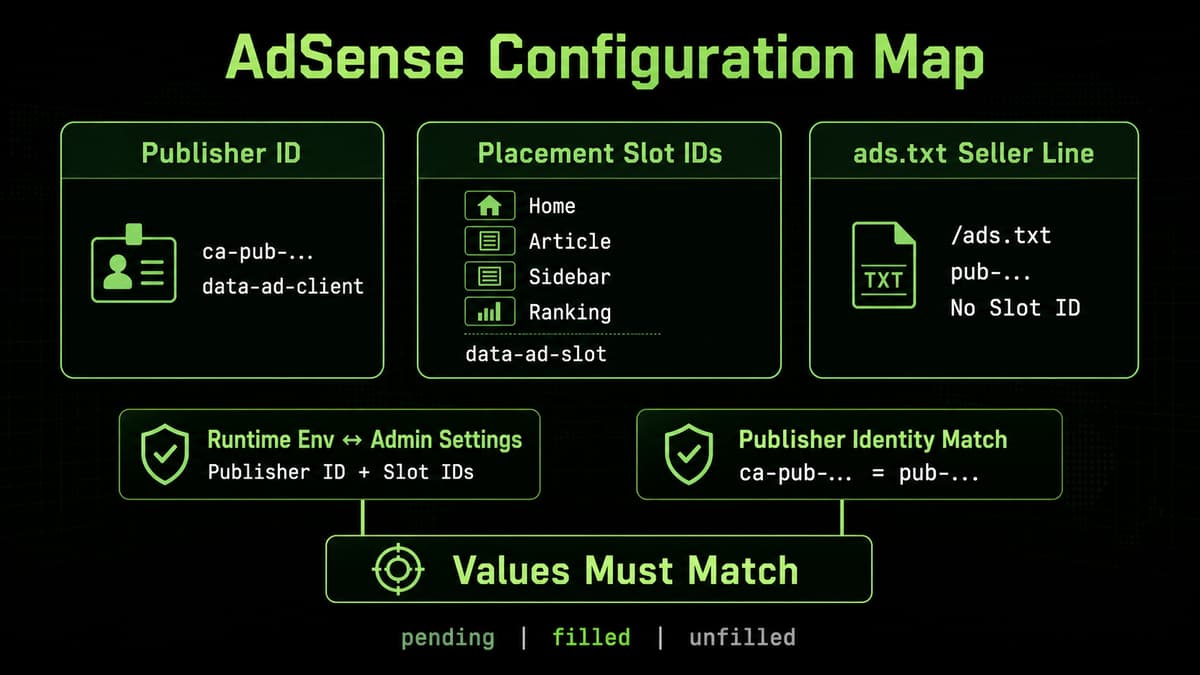
Mapping one publisher identity to several distinct ad slots for separate page placements
*Diagram: the publisher identity is shared at site level while each placement keeps its own ad-unit slot.*
Separate the three values
A publisher ID identifies the AdSense account and has the form pub-…. The same identifier appears as ca-pub-… in ad code and data-ad-client.
An ad unit ID, called a slot ID in this repository, is the numeric value in data-ad-slot.
The ads.txt seller line belongs at /ads.txt, uses pub-…, and does not contain a slot ID.
Copy these values from AdSense account information or generated ad-unit code. Do not infer them from an admin URL, and use placeholders in articles and shared logs.
Mapping to this repository
The root layout renders AdSenseLoader only when marketing settings enable ads and a client is available. The client effect appends the AdSense script to document.body only after optional-cookie consent and removes it when consent is withdrawn. AdSlot fetches public marketing settings and creates <ins class="adsbygoogle"> only after hydration, with consent granted and both client and slot available.
Placements are separated into home, article, sidebar, and ranking, with default as a fallback. Distinct units improve reporting here, but reusing a unit is not described as a Google policy violation.
The /ads.txt route reads NEXT_PUBLIC_ADSENSE_CLIENT from the runtime environment, while the UI also stores marketing settings. Updating only one source can create a mismatch, so production verification checks both.
Safe configuration sequence
Create responsive display units in AdSense and copy ca-pub-… plus each numeric data-ad-slot from generated code.
Set the runtime client and placement slots, then keep the saved marketing configuration consistent.
Verify that /ads.txt returns plain text on the canonical host and matches the seller line supplied by AdSense.
Inspect the live loader and placement-specific <ins> elements. In this repository, pnpm run ads:audit checks the static mapping and scripts/verify-live-ads.mjs checks production.
Treat those checks as configuration verification only. They do not replace AdSense review.
Diagnose an empty unit without guessing
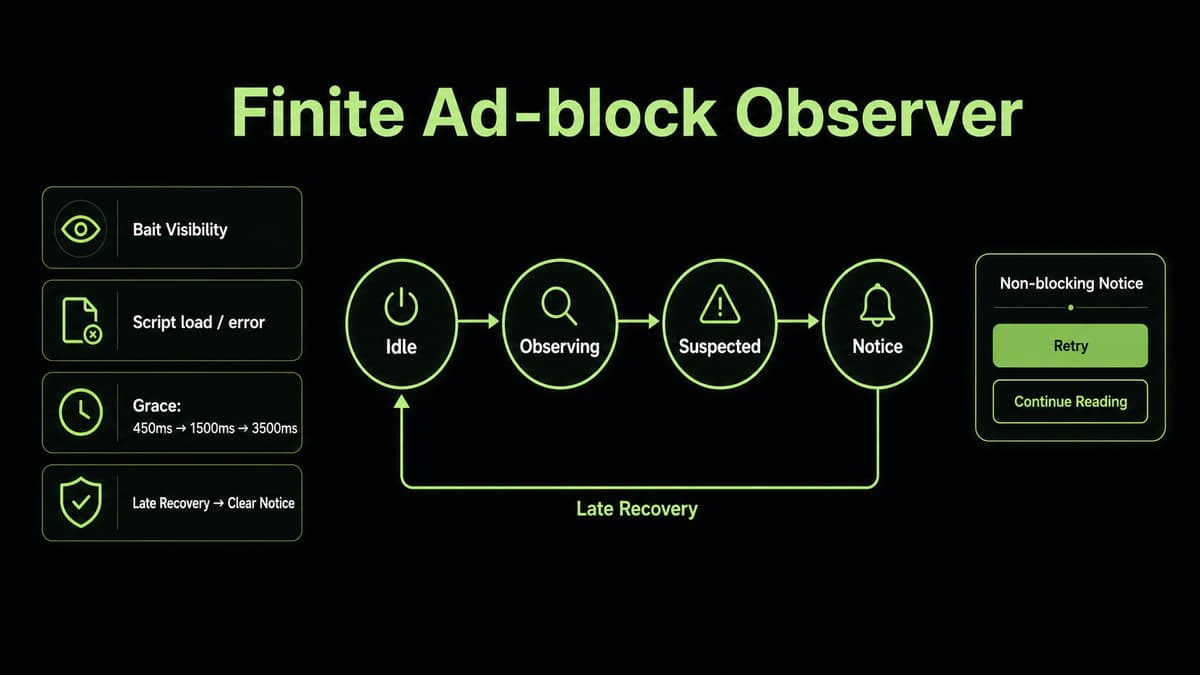
AdSlot observes Google's data-ad-status: filled is displayed, unfilled switches to the local fallback, and a still-pending request is not failed merely because time passed. An unfilled unit is not proof of an ad blocker.
Separate site-review state, ads.txt status, DOM configuration, network errors, consent, and inventory. Never ask readers to click ads and never place ads so they can be mistaken for navigation.